这篇教程Python Flask搭建yolov3目标检测系统详解流程写得很实用,希望能帮到您。
【人工智能项目】Python Flask搭建yolov3目标检测系统 
后端代码from flask import Flask, request, jsonifyfrom PIL import Imageimport numpy as npimport base64import ioimport osfrom backend.tf_inference import load_model, inferenceos.environ['CUDA_VISIBLE_DEVICES'] = '0'sess, detection_graph = load_model()app = Flask(__name__)@app.route('/api/', methods=["POST"])def main_interface(): response = request.get_json() data_str = response['image'] point = data_str.find(',') base64_str = data_str[point:] # remove unused part like this: "data:image/jpeg;base64," image = base64.b64decode(base64_str) img = Image.open(io.BytesIO(image)) if(img.mode!='RGB'): img = img.convert("RGB") # convert to numpy array. img_arr = np.array(img) # do object detection in inference function. results = inference(sess, detection_graph, img_arr, conf_thresh=0.7) print(results) return jsonify(results)@app.after_requestdef add_headers(response): response.headers.add('Access-Control-Allow-Origin', '*') response.headers.add('Access-Control-Allow-Headers', 'Content-Type,Authorization') return responseif __name__ == '__main__': app.run(debug=True, host='0.0.0.0')展示部分python -m http.server


前端展示部分 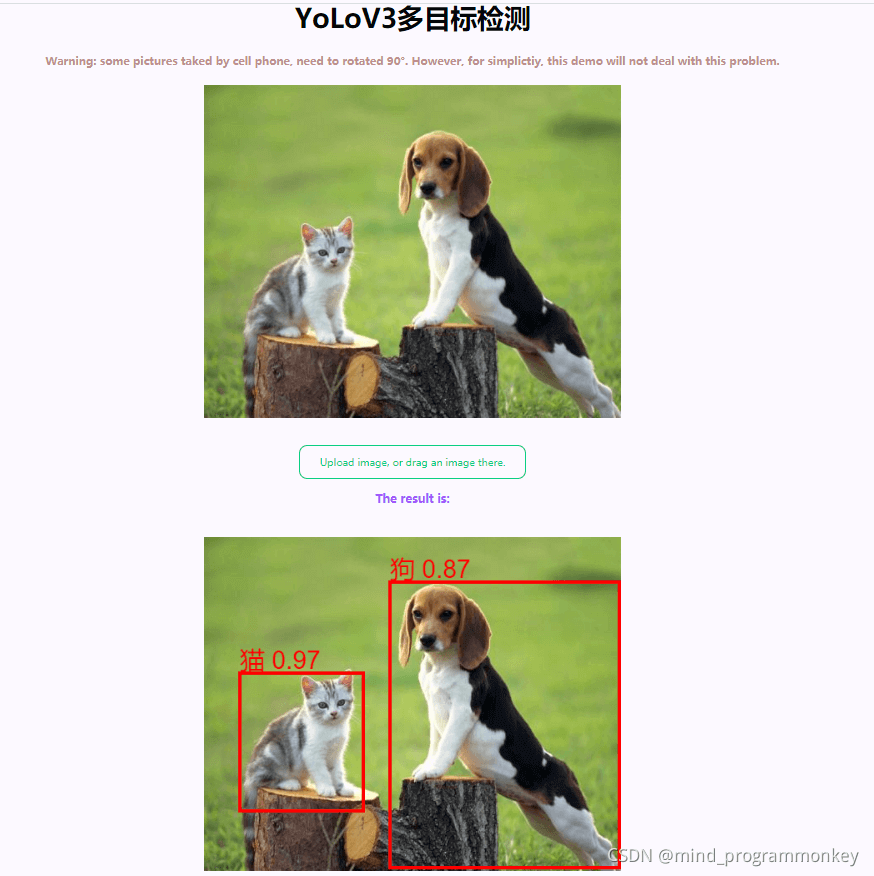
到此这篇关于Python Flask搭建yolov3目标检测系统详解流程的文章就介绍到这了,更多相关Python 目标检测系统内容请搜索51zixue.net以前的文章或继续浏览下面的相关文章希望大家以后多多支持51zixue.net!
关于 Python json中load和loads区别
Python基础 括号()[]{}的详解 |


