这篇教程Photoshop给阴沉的婚片增加阳光色彩写得很实用,希望能帮到您。
最终效果 
原图 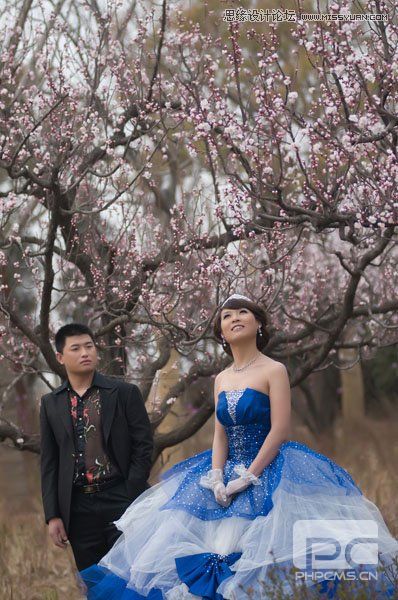
1、打开原图素材,把背景图层复制一层,混合模式改为“滤色”,不透明度改为:50%,然后合并图层。 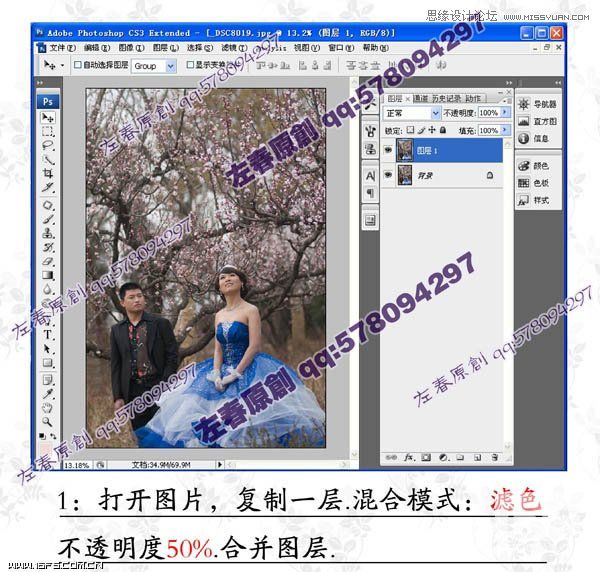
2、把背景图层复制一层,创建色相/饱和度调整图层,把全图的饱和度设置为:+60,效果如下图。 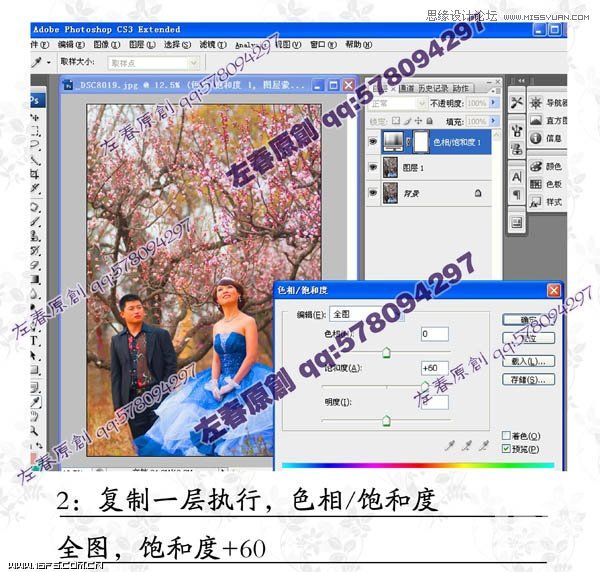
3、用橡皮擦工具,不透明度:30%,流量100,把脸,手轻微擦拭出来。 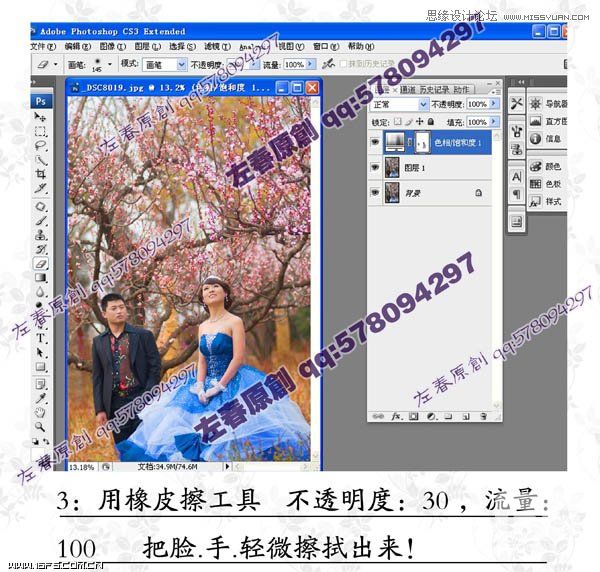
4、用套索工具把脸和手大概的圈出来,按Ctrl + Alt + D 羽化60个像素。 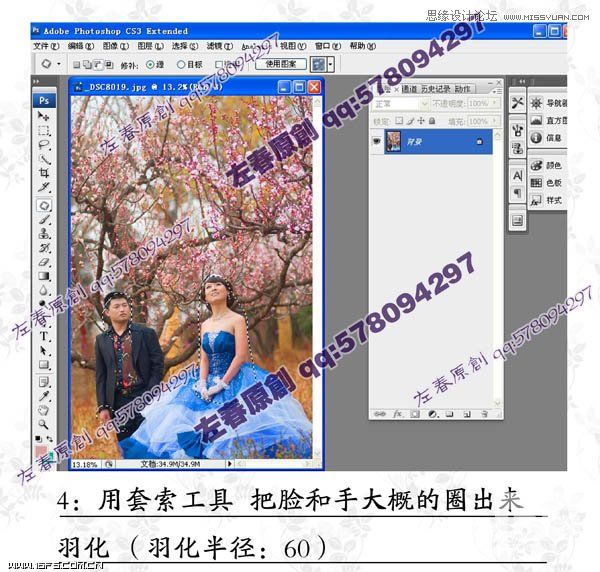
5、创建可选颜色调整图层,对黄色进行调整,参数设置如下图。确定后合并所有图层。 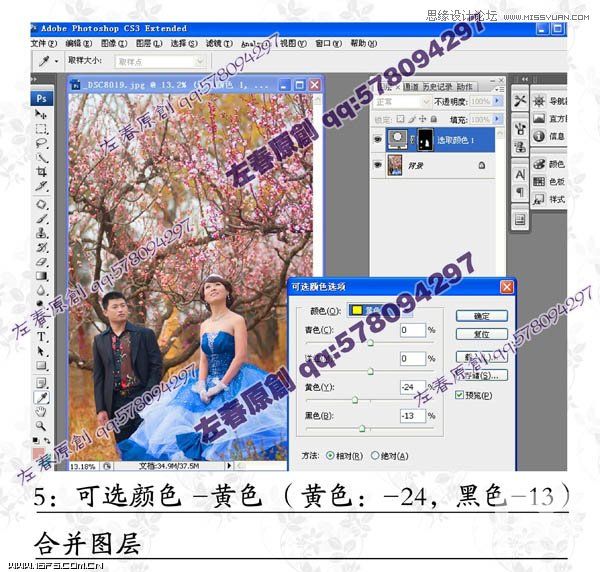
Photoshop调出夏日外景柔和日系色调
Photoshop打造木质谦镶嵌效果的艺术字 |