这篇教程Photoshop制作绚丽的万花筒背景教程写得很实用,希望能帮到您。
前两天在网上瞎逛的时候看到一个国外的photoshop网站,觉得一个绚丽的万花筒效果很是不错,想学着做,可是面对这满满的英文,这让我怎么跟着做啊,图层样式都不截个图说明下,这么勤快写下来干嘛,截图不就完事了,算了算了,我们是做设计的,总能找到解决的方法,来来来,大家和本狼一起来研究下吧。 先看看效果图 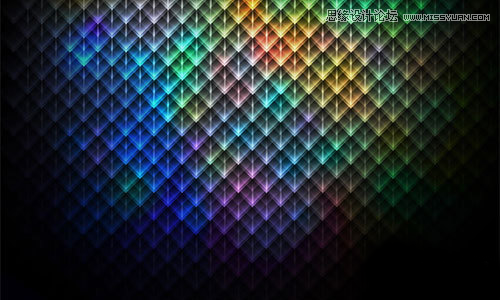
新建一个1366×768PX,分辨率为72像素/英寸的画布,前景色为黑色,填充画布。设置前景色为白色,用矩形工具画一个白色矩形,自由变换【CRTL+T】下,旋转45°角。将该图层的填充设置为0,添加图层样式: 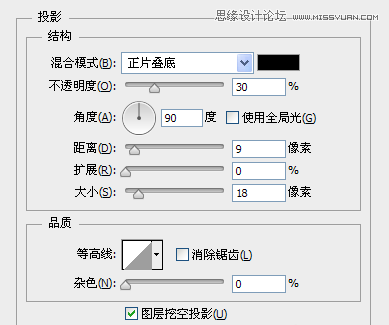

这样设置之后,我们会得到如下样子: 
给图层添加一个蒙版,用柔边的画笔把矩形的边缘和底柔和进去,然后把图层的不透明度调为30%,大概是酱紫滴: 
双击手抓工具,看看效果,大概是酱紫滴: 
步骤二:绘制菱形组 复制图层,挪动下位置: 
Photoshop教您如何给后期照片添加光斑
Photoshop制作梦幻绚丽天使翅膀合成教程
|