|
VMware虚拟机安装Ubuntu20.04详细图文教程
1 VM和Ubuntu下载Ubuntu系统下载官方链接:Ubuntu系统下载 
VMware下载官方链接: VMware Workstation 16 Player下载 
下完VMware直接安装就行了
2 VM安装Ubuntu双击打开VMware Workstation 16 Player 
点击创建新虚拟机 
选择稍后安装操作系统,再点下一步 
然后注意这两个地方,选择操作系统和版本如下,再点下一步 
自己定一个系统存储位置,再下一步 
最大磁盘大小按需修改,选择存储为单个文件,再下一步 
点击自定义硬件 
选择使用ISO映像文件,浏览选中刚开始下载的Ubuntu系统,然后点右下角的关闭,再点完成 
选中,点击播放虚拟机 
然后等待… 
进入之后,下拉选中 中文简体,再点Ubuntu安装 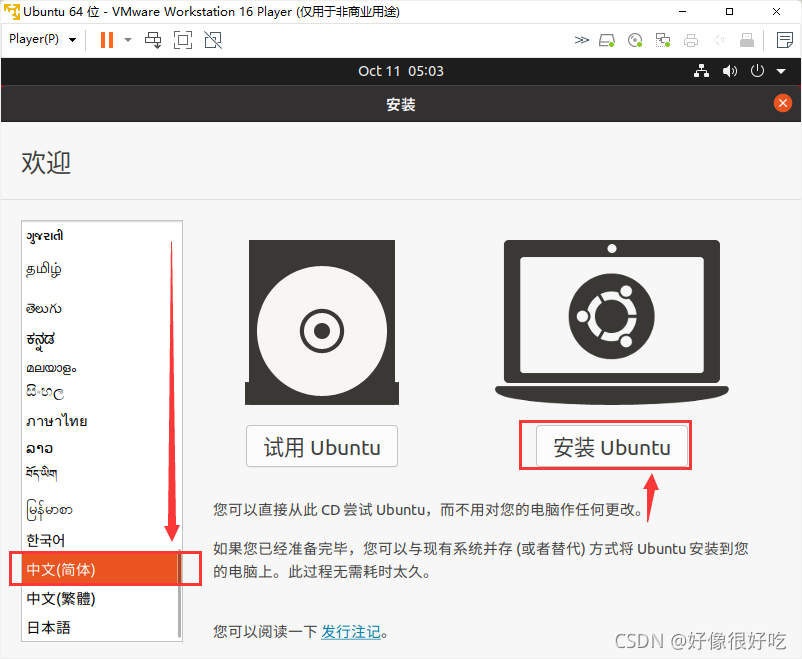
再双击chinese。这里因为Ubuntu系统显示器大小不对,下面的界面显示不出来,我们在下一步先来修改它的显示器大小 
到这里后,本来右下箭头所指地方有 继续 按钮,但是显示不出来,我们先关掉安装界面,退出安装 

等待…然后进入如下页面,点击右上角倒三角形,再点击设置 
下拉找到显示器,点击分辨率 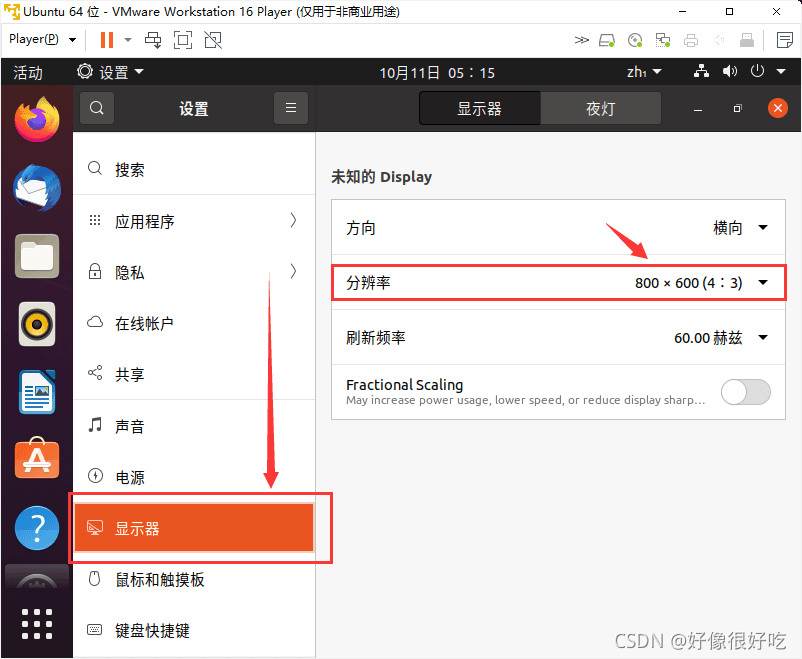
任意改为另一个,例如1024x768,再点击应用 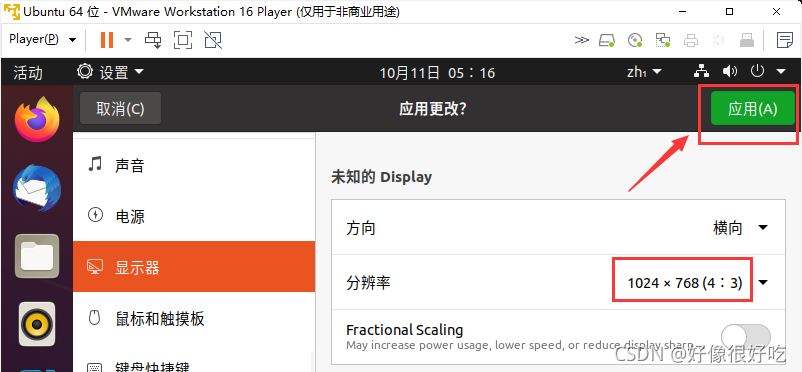
选择保留更改 
然后点击左上角图标,重新进入系统安装 
可以看到这时能显示继续的按钮,点击继续 

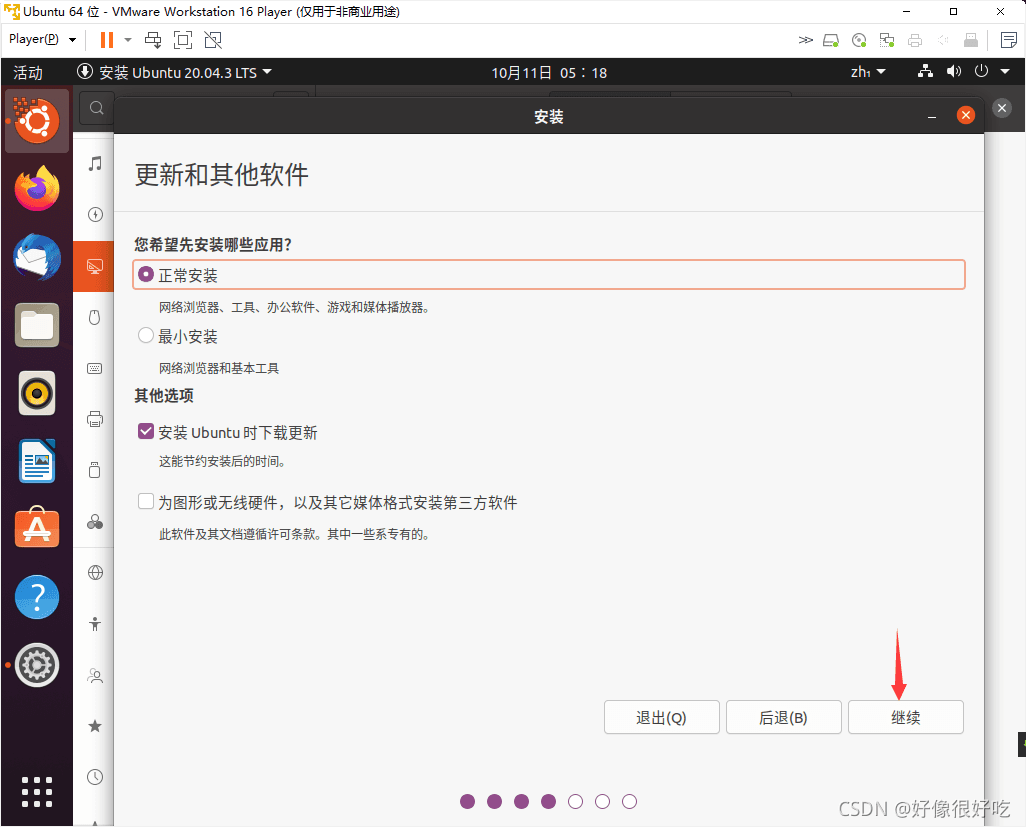
点击现在安装 
再点击继续 
选择地区
点中国所在范围 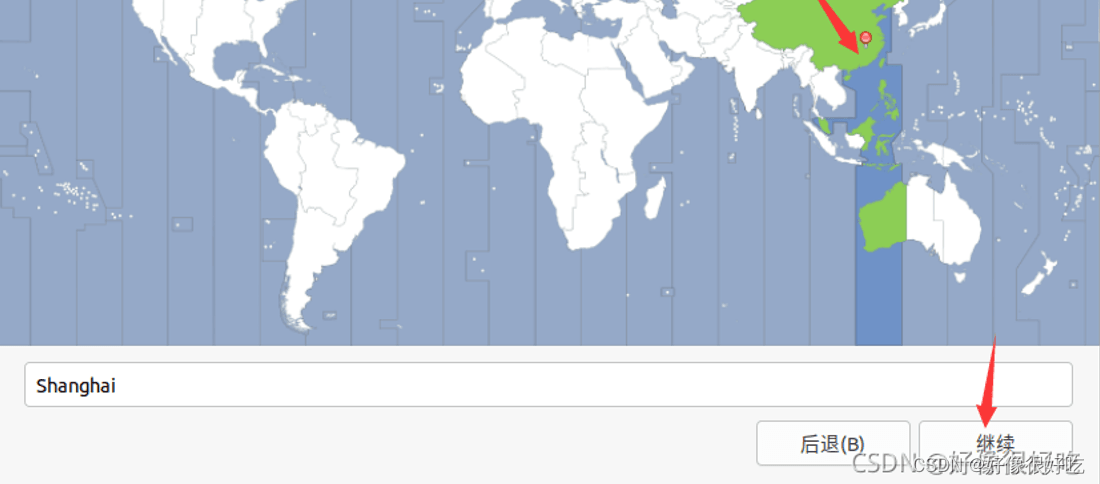
自行填写以下信息 
然后便进入安装等待界面 
下载文件时间较长,可点击展开选择skip,然后再等待一段时间… 
安装完成,提示重启,点击重启 
然后根据提示,进入系统,显示如下界面,即安装完成。 
3 更改Ubuntu软件源配置系统的软件源,提高下载速度
先点左下角矩形网格,找到并打开 软件与更新 
按图示修改 
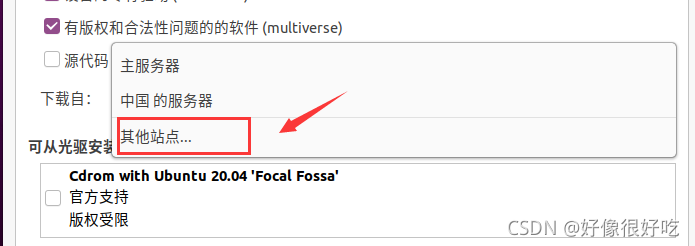
点击选择一个服务器,如第一个,再点选择服务器 
再点关闭 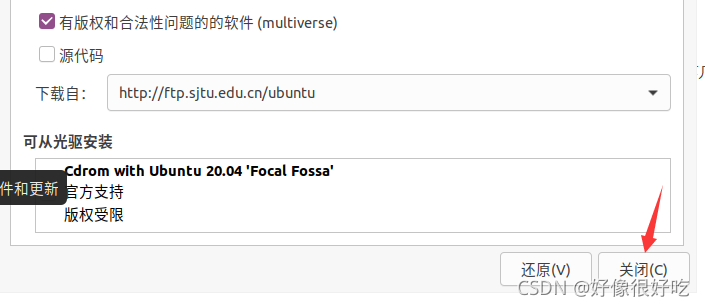
点击重新载入,并等待 
其中需输入密码,即之前自行设置的密码,此后有软件更新点击更新即可
到这里软件源更改完成。
4 Windows与Ubuntu跨系统复制粘贴打开终端,手动输入以下命令,再重启ubuntu系统就可以了
即通过安装VMtools实现了Windows与Ubuntu跨系统复制粘贴,也实现了Ubuntu窗口自适应 sudo apt-get autoremove open-vm-toolssudo apt-get install open-vm-toolssudo apt-get install open-vm-tools-desktop 参考:Copy/paste and drag&drop not working
下载地址:
Ubuntu系统端口查询与管理的详细分析
linux压缩解压命令使用方式(无废话版) |


