这篇教程Photoshop制作简单的蓝色光晕特效教程写得很实用,希望能帮到您。
效果图为比较简单的光晕,由线条及柔和的色块构成。制作的时候先做出色块,然后变形就可以得到想要的小光束,再渲染一下中间及边缘的高光即可。 最终效果 
1、新建一个1500 * 1200像素,分辨率为72的画布。把背景图层填充黑色,如下图。 
<图1> 2、新建一个组,在组里新建一个图层,选择椭圆选框工具,按住Alt + Shift + 鼠标左键拖动拉一个较小的正圆选区,如下图。 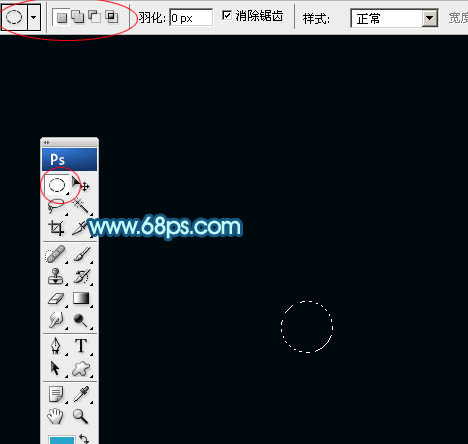
<图2> 3、点击前景色调出拾色器面板,把颜色设置为青蓝色,如下图。确定后按Alt + 删除键填充前景色,取消选区后效果如图4。 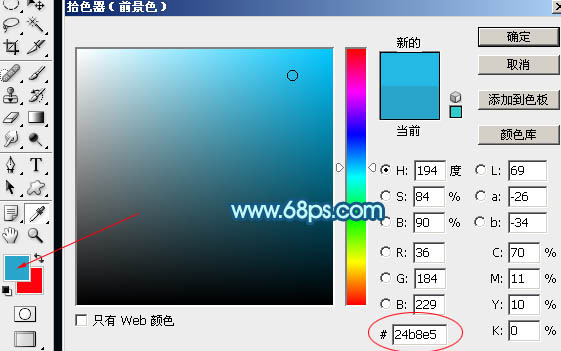
<图3> 
<图4> 4、按Ctrl + T 对圆形变形处理,先压扁一点,然后再拉长,过程如图5,6,效果如图7。 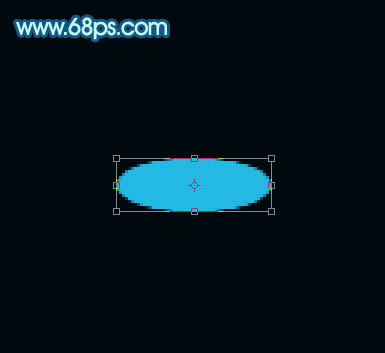
<图5> 
<图6> 
<图7>
Photoshop制作漂亮的水晶音符图标教程
Photoshop合成在空中飞舞的女神PS教程 |