这篇教程Photoshop制作立体效果的正方形迷宫写得很实用,希望能帮到您。
今天我们将一起来学习用AI制作出一个超酷的立体迷宫效果,教程学习难度适中,需要朋友们有一定的耐心,制作出的迷宫也很酷,希望朋友们喜欢本教程。 我们先来看看制作出的效果: 
具体的制作步骤介绍如下: 打开AI,用矩形工具分别绘制50px×50px、700px×700px的矩形各一,粗为10pt的黑色描边,无填充。Shift+F7调出对齐面板,让这两个矩形中心对齐。 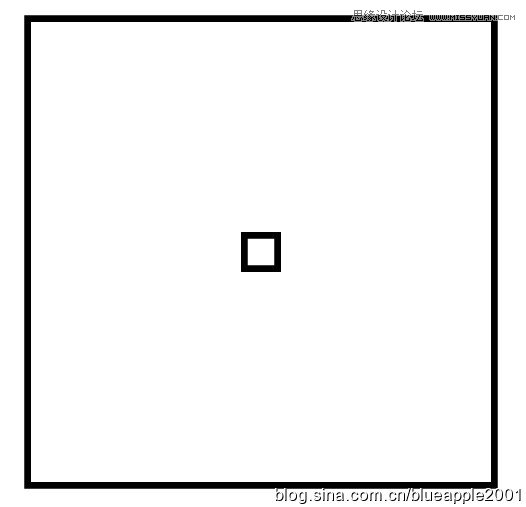
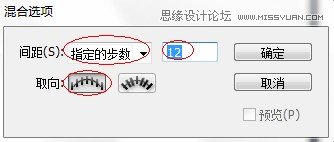
【对象】|【混合】|【混合选项】,设置混合选项的间距属性为指定步数,12步。 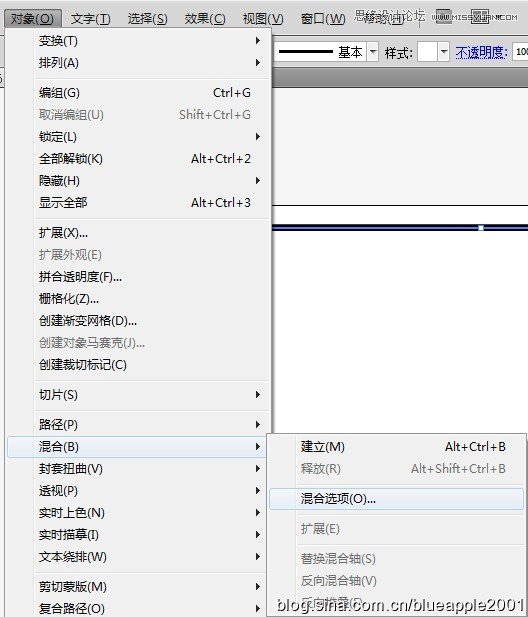
Ctrl+Alt+B建立混合。效果如下。 
【对象】|【扩展】。 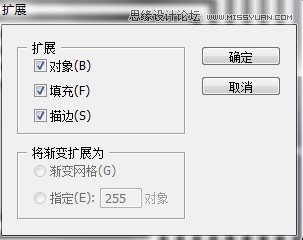
这样得出的图形是编好组了的,为了便于选择,Ctrl+Shift+G取消编组。用铅笔工具绘制自己想要的路线。我这里用红色描边示意—— 
Illustrator快速绘制时尚酷炫多边形海报
Illustrator制作2012龙年插画教程 |